Wednesday, April 17, 2024

Bye Bye Birdy Postage with TCP


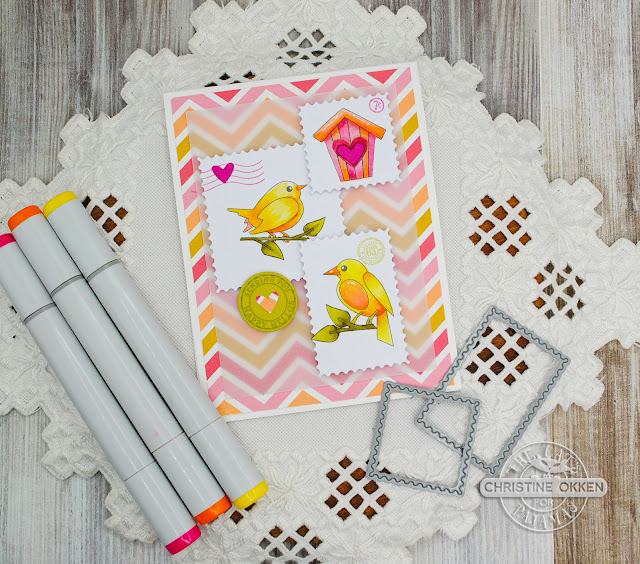
Hello!  Today I’m bringing you some of the March Release goodies from The Cat’s Pajamas for a second look.  I didn’t get a chance to play with all of the sweet things from the Release, so today I am creating with the Bye Bye Birdy digital set.  These sweet little chirpers will steal your heart!   This is a creative set that offers both lined bird and birdhouse images as well as images already coloured in to make really quick cards.  I pulled out my Copics and brought some sunshiney colour to them.  


After adding some white gel pen accents to the images I cut out the images with a retired TCP postage themed dies with deckled edges, and then added some postmark stamping with another retired TCP postage themed polymer stamp.  Postage style cards are certainly on-trend right now!  

I placed all the images on some brand new digi-paper from TCP called Spring is Here!  I printed it on some textured white cardstock and it really grabbed the printer ink nicely!  Then a layer of vellum anchors the postage with a few die cut hearts as accents.  


Cuties!  I’ve been hearing the Robins lately in my neighbourhood and it gives me great delight!  Enjoy your day, thank you for stopping by!  
 

Tuesday, April 16, 2024

Two Techniques with Crafty Meraki!


Hello Crafty Meraki friends!  Today I’m back with week THREE of my Guest design posts for Crafty Meraki , and this week we’re all about techniques!  I have two designs with two different techniques but similar colour palettes to show you today.  

First up, I created a design that showcases foiling, ink blending, and a faux spotlight technique with a lovely result.  

I began by ink blending the background of white paper with Distress Oxide Inks in blues to raspberry shades in an ombre feel.  I heat set the paper and then foiled the beautiful 
Crafty Meraki Elegance Hot Foil Plate onto it with my Glimmer Machine in silver.  I foiled the image a second time on Copic XPress it Blending paper, and used that for Copic colouring part of the image.  


When my colouring was completed, I trimmed out the part of the image that I wanted to use as a type of “spotlight” of the design, where just part of the image is coloured, and attached it with foam dots.  


I also foiled the sentiment from Handmade Love.  I die cut a sparkly silver frame to add attention to the Copic coloured part of the design, which also serves to anchor that part of the card, and finally added some silver enamel dots for more shimmer and shine.  

My second card showcases embossing and watercoloring!


I have loved watercolouring for so many years, so it was high time I pulled it out again!   I began by heat embossing the lovely arrangement from the stamp set Reason to Smile onto watercolour paper with Embossing ink and a heat tool.  The raised silver embossing creates a “border” for the watercolouring to sit in which makes painting the small sections a quick process.  I used Daniel Smith watercolours for their beautiful vibrancy.  


I painted in a very soft wash of background, some paint splatter and then white acrylic paint splatter to bring some texture.  


The embossed sentiment is included in the set and I added it onto a coordinating colour of cardstock, trimmed it out and popped it up on the design with foam dots, and a few enamel dots to match.  That soft creamy white is such a lovely backdrop for the vibrant flowers!  

Thanks for joining me today!  

Sunday, April 14, 2024

Monday Sunshine with Concord & 9th


Hello!  How about some sunshine to get ready for Monday morning?!  I have a cutie here from Concord & 9th with their newest Turnabout Stamp called Folkart Flower.  These stamps are a nice way to create your own layers of colour in a patterned paper style of print with up to 4 colours of ink, or you can stamp with less colours, even monochrome.  And this one is extra fun because you can choose to remove the center of the stamp to make space for a focal image.  I picked a fun colour combo I liked that sang Spring to me.  


I’ve paired the background stamping with some pretty die cute flowers from the Build a Bloom Dies to coordinate with the stamping.  This card is a 5 x 5 size.  


The sentiment is from the Turnabout Stamp, and I’ve added some extra enamel dots and leftover paper pieces to accent the middle like confetti.   

Thank you for dropping by!  
Thursday, April 11, 2024

Circular Posies with Pinkfresh Studios


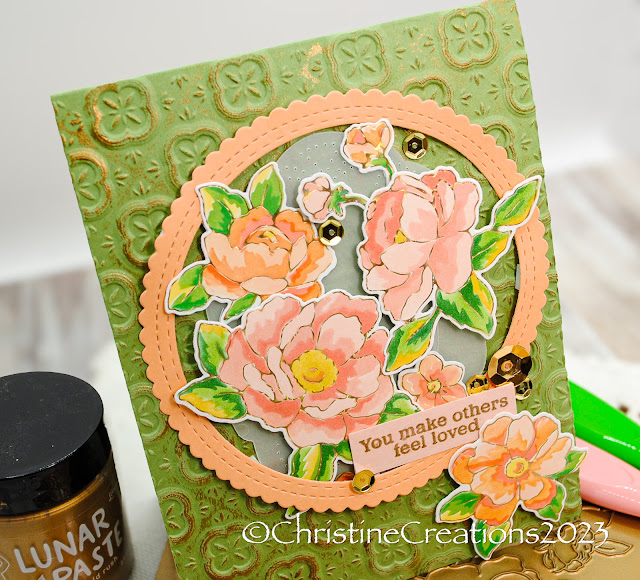
Hi Again!  I’m back with more flowers.  I just can’t get enough.  Today’s pretty posies are from Pink Fresh Studio and are called Peony Fantasy.  Included in this suite are the Hot Foil Plate, Coordinating Die, and the coordinating stencil.  I think it’s a beautiful bundle of products.  I finished a card with this bundle a few weeks ago, but had a few leftovers perfect for a new design.  

I’m playing along with Pink Fresh Studio’s Monthly Challenge for “Circles”.  This circle die perfectly frames the layers of flowers and vellum!  


So, I hot foiled, stenciled and die cut a few extra blooms with a more orange tone, which pairs nicely with the peach blossoms.  The card base is created with a Simon Says Stamp Embossing Folder called Margot Tile.  After running it through my machine, I swiped gold Lunar paste over the impressions to really give it the feeling of a tin ceiling.  


The sentiment is embossed in gold, and then some gold sequins accent the shimmery gold of the design.  


Tuesday, April 9, 2024

Petite Flower Frame with Alex Syberia

Floral Framed Best Wishes

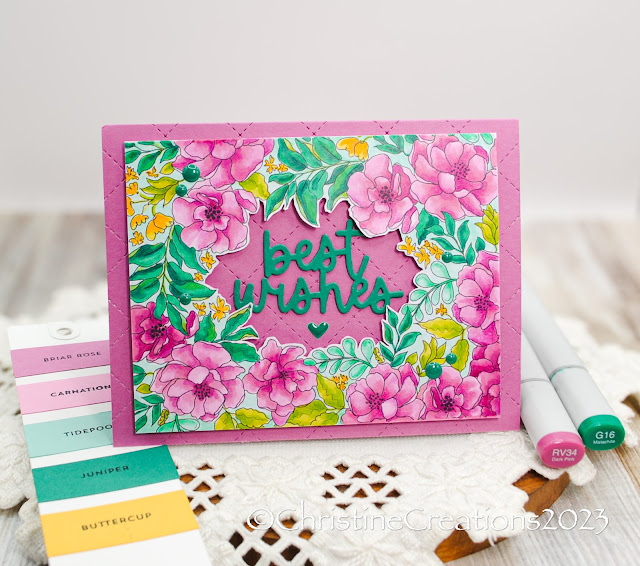
Hello on this Wednesday Eve!  I’m back with some more pretty and petite flowers from Alex Syberia called Grateful Heart it’s a digital design and right now Alex Syberia is working on a reopening, so I won’t be able to link the image, but oh isn’t it the sweetest?  I love the little flowers in a frame.  


Colouring is done with Copics and finished with coloured pencils, and then I fussy cut out the center of the design to make room for the background of the card base in this pretty Briar Rose colour from Concord and 9th.  That layer is run through the Quilted Card Front Die.  


I die cut the sweet sentiment from Concord & 9th’s Everyday Expressions dies, layered 3 x for some thickness.  Then a few enamel dots to sweeten the finish!    Pretty cute!   

Slimline Bouquet Duo with Crafty Meraki


Hi Friends!  I’ve had such fun with today’s cards from Crafty Meraki!  This week we’re focusing on Slimline designs and I chose to work with the amazing mega stamp Birthday Bouquet, which is so big and beautiful you can create 2 mini slimlines from one stamp.  So, I have two designs to show you again today.  


I started by colouring the gorgeous florals with Copics and coloured pencils in a fun coral and purple palette, then cut the image down the middle and fussy cut the image out.  I focussed on a different colour background for each card.  For this design its all about gold and green accents.  I added a rich green background with intricate detail from the Mini Slimline Parisienne Para-Dies.  


Then to give it some glitz and glamour I added sparkly gold paper die cut with the Olive Leaf Para-Dies,  and then a bold gold foiled sentiment with Meraki Moments Hugs Hot Foil Plate and Die.  


For a little more glam, I completed the design with gold sequins.  

Next I created a mini-slimline easel fold with the other half of the coloured image.  


For this design I showcased the beautiful coral colour in the background.  To create the easel, I cut the cardstock to be 6 1/4 x 8 1/2, and scored on the long side of the cardstock at 3 1/2 and 7.   Then I cut a number of coral die cuts from the Olive Leaf Para-Dies, ink blending them with soft purple, then placing them throughout the card base as a backdrop for the flowers.
  

I added a sentiment from the stamp set, as well as an enamel heart to be the “stopper” for the easel.  A few enamel dots accent the sentiment.  It’s a fun explosion of colour!  

Appreciate you joining me today!